Screen Printing Basics
Did you ever wonder how t-shirts are printed? Well, you've come to the right place. We like to educate our customers, because knowing is half the battle.
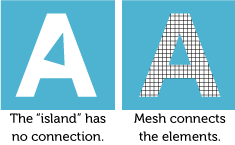 If you've ever spray painted a stencil, you've got the basic concept of screen printing. In fact, you can try this DIY project to make your own t-shirts at home, without any special equipment. But you'll quickly find the limitations of stenciling. In screen printing, the stencil is made on mesh, which allows us to have "islands" in our design, unlike a traditional stencil.
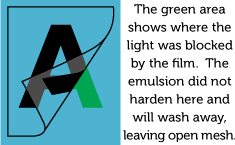 The mesh is first coated with a photo-sensitive emulsion, which hardens when exposed to light, or "burned". We make a film positive which selectively blocks the light, allowing the un-hardened emulsion to be washed away with water. We're now ready to go to press and start printing!
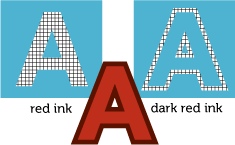 The first step in the printing phase is registration, or lining up our images on press. This is especially important in multi-color work, as we will have a different screen for each ink color. They all need to line up with each other exactly. A good quality carousel-type press is essential for this type of printing.
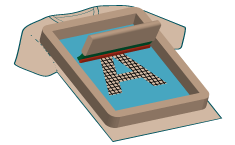 Now we can force ink through the open area of the mesh with a squeegee. Just like spraying paint through a stencil, only a bit more refined. There a few different types of ink we can use:
- Plastisol - The most common type of ink. Does not air dry. Must be heated to ~325° F to cure. Great coverage on dark garments, e.g., white ink on a black shirt. Can have a stiff rubbery feel, or "hand", on the shirt.
- Water-based - Becoming more popular these days. Does air-dry, and will dry in the screen if precaution is not taken. Popular for its soft hand. Does not cover well on dark garments.
- Discharge - Water-based ink mixed with a special agent that discharges, or bleaches, the dye from the shirt. Combines the soft hand that water-based is known for with the bright colors that plastisol is known for. However, it contains some aggressive chemicals.
 ORabbit Designs offers all three types of ink. After the ink cures, the shirts are ready to go! In the case of discharge, they should be washed before wearing. This is a simplified version of the process, but hopefully it helps you to understand what's involved in turning your artwork into a finished product. Speaking of artwork, we'll discuss that in the next section.